Sequor MTC
SEQUOR MAINTENANCE - MTC
Maintenance as The Protagonist
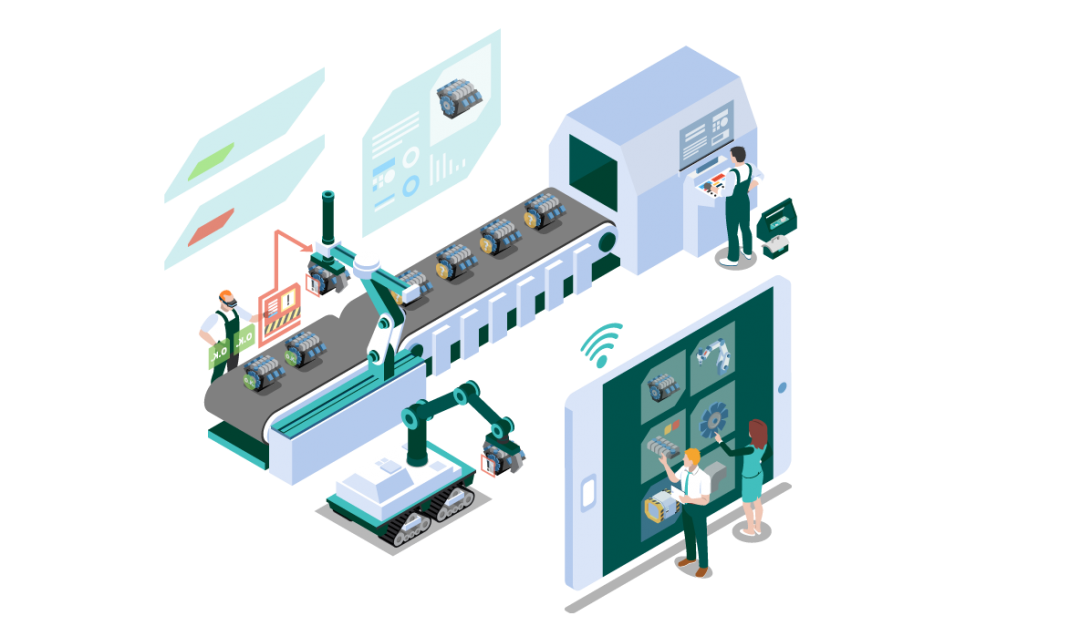
The Sequor MTC is a CMMS (Computerized Maintenance Management System) solution, capable of providing high performance in the management and execution of the company's processes industrial maintenence. Built on the concepts of ISA 95, Sequor MTC allows to optimize the management of all elements that make up the maintenance area: materials, spare parts, stock, tools, vehicles, tasks and personnel.
MTC
Accuracy and Efficiency
O Sequor MTC permiteSequor MTC allows you to accurately and efficiently manage all your resources and maintenance activities. Optimizing, organizing, planning and scheduling in advance all activities in the sector becomes an easy task. Make maintenance a protagonist of your company's success.
Torne a manutenção um protagonista do sucesso de sua empresa.

SAVING AND OPTIMIZING
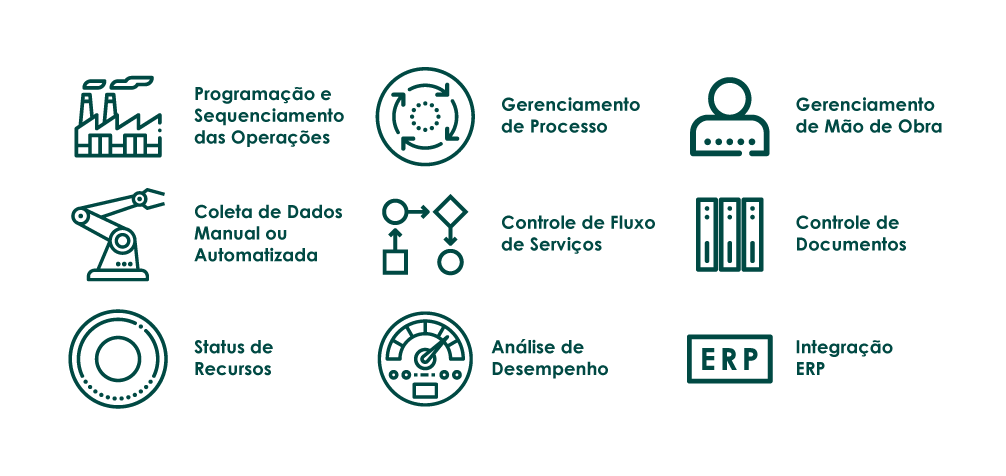
Value added by Sequor MTC
- Increases the availability of machines and equipment
- Reduces operating costs for maintenance
- Reduction in the number of corrective maintenance (emergencial)
- Optimization in the use of resources, personnel and equipment
- Eliminates the use of spreadsheets and forms (100% paperless)
- Reliable and accessible information in real-time
- Allows use in remote areas without connectivity
- Allows digital notes (option to attach photos and videos )
- Provides work instructions and manuals on the Mobile
- Online management of indicators
MAINTENANCE 4.0
Optimize Performance
- Guaranteed to store and access all historical data
- Spare parts inventory management
- KPI's dashboards and performance indicators in real time
- Calculate and compare the performance of each resource. Optimize your team and work routines

MODULAR SYSTEM
Growth as needed
As the system is modular, you can start with few resources and grow according to your needs.